Boli for Thiruvananthapuram Sadya
Today is Thiruvonam. So, let me bring you something special. For south Keralities, boli is an integral part of Kerala Sadya, served along with Vermicilli payasam or Rice Paal payasam. This sweet yellow colour boli is quite common in southern Kerala, while it’s unfamiliar to most of Malabar people who serve yellow boondi with Palada or Vermicilli payasam for Kerala Sadyas. In rare occasions, boondi is also served in south Kerala sadyas. Boli which resembles a pappadam is yellow in colour (because of yellow colour added) is a good combo for Palada or any type of kheers.
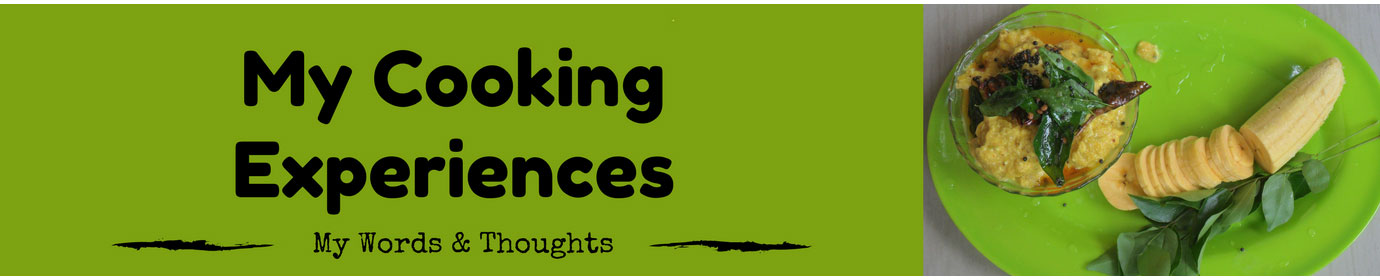
Boli & Vermicilli Payasam – An integral part of Thiruvananthapuram Sadya
Boli is not at all a Kerala dish. It’s a Tamil Nadu sweet, mostly made by Brahmins, but accepted by Kerala people for its taste and aroma. It requires a lot of dedication and hard work to prepare bolis, and you may need to try at least 2-3 times to make your bolis perfect. But your hard work is paid, because it’s a very delicious sweet that can be used as a snack as well. Its variant is stuffed boli and both are good. So, let me provide you the recipe of Thiruvananthapuram Sadya’s own boli. Also read: Complete dishes of Thiruvananthapuram Sadya.
Ingredients to prepare Boli:
1. Bengal gram (Kadala Paripp) – 1/2 kg
2. Maida – 2.5 cups
Salt – A pinch
Gingelly oil – 50 gm
3. Sugar – 1/2 kg
Yellow food colour – As needed
4. Nutmeg powder – 1/2 tsp
Cardamom powder – 1 tsp
5. Ghee – 100 gm
Finely grinded rice powder – As required
How to prepare boli?
1. Soak Bengal gram for a while. You can do it for two-three hours.
2. Add 3.5-4 cups of water to soaked Bengal gram and cook it in pressure cooker.
3. Bengal gram should be well cooked. So after the first whistle, reduce the flame and simmer it for 5 more whistles.
4. When its pressure drops to zero, drain its moisture completely, and kept it aside for a while. During this time we can prepare maida mixture.
5. Take 2.5 cups of fresh maida in a bowl and add a pinch of salt. Mix both the ingredients together.
6. Add yellow food colour, enough water and mix the contents again well. The yellow colour should mix uniformly.
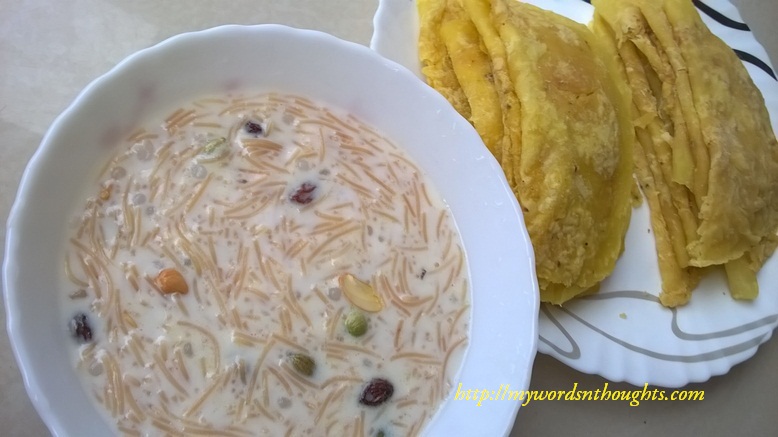
7. The prepared maida dough should not be as tight as chapatti’s. It should not be too loose too. The water content of maida dough should be enough to cover Bengal gram balls, and roll like chapatti.
8. Press maida dough well into the bowl and pour full gingelly oil on its top.
On the process to make maida dough for boli using gingelly oil
9. The dough should be fully immersed in the gingelly oil. Use your hands to fully immerse maida dough in the oil.
10. Keep it aside for 20-30 minutes. We can prepare Bengal gram filling for our boli during this time.
11. Place a non-stick pan in flame and add cooked Bengal gram along with sugar to it. Stir continuously. Add a little yellow colour also. You can also add a little ghee to it to make it tastier. If so heat ghee first before adding gram and sugar. (If you don’t want excess colour, you can avoid yellow colour here or use turmeric powder. But to get trademark yellow colour for the dish, include this step as well).
12. Once the mixture gets heated it turns loose. Stir continuously still water content is almost absorbed. Never make the mixture too dry. If so, your bolis may turn rough and hard, and may be not easy to roll.
13. Add cardamom powder and nutmeg powder and mix well. Put the flame off. In fact the combo of cardamom, nutmeg and gingelly oil gives the sweet and distinct aroma to boli.
14. When the Bengal gram mixture cools, grind it to a fine paste without adding water. You can choose traditional method or an instant mixer.
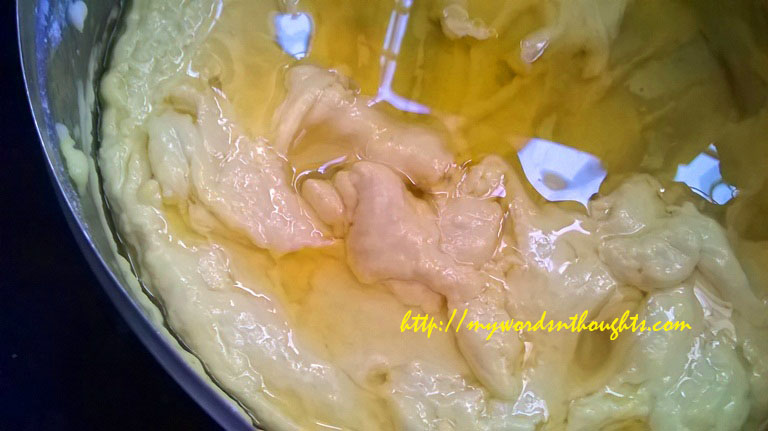
15. Make lime sized balls from it. We get almost 30 balls of equal size from this amount of Bengal gram mixture. This is the filling used for preparing boli.
Bengal gram balls used as filling of boli
16. Now we can prepare maida balls. Balls should be gooseberry sized, almost 1/3rd size of the Bengal gram balls. Oil content will make maida flour slippery and helps you in making perfect bolis.
17. Now next step needs a little practice and a little bit patience as well. Cover each big sized Bengal gram balls with small gooseberry sized maida balls.
18. Maida is elastic in nature, and when combined with oil, it makes the job pretty easy. A little practice is needed to cover Bengal gram balls with maida balls.
19. Your bolis turn perfect and would be in perfect shape if Bengal gram balls are completely covered, and uniformly. The filling mixture should never be shown outside. If so, it will break while we spread it like a chappathi.
20. Take rice flour in a plate and place each ball in it and flip once. Repeat the same process for all the 30 balls.
21. Now the next step is to roll each ball into flat round shaped bolis similar to raw pappads used for frying. They should be thin and rolled uniformly with filling completely covered by maida. You can use a chappathi board for this purpose.
22. Similar to chapattis, sprinkle a little bit of rice flour to spread them fine. Excess flour gives white patches on yellow bolis. So keep it minimum. Through practice, you can achieve it for sure.
23. Heat a non-stick tawa. Take one by one and put it in the tawa.
24. When blisters on its surface, sprinkle a little ghee on the top and flip once.
25. Sprinkle a little more ghee, just wait for a second and fold it once. Place it in your plate. It takes only a few seconds to cook each boli.
26. Continue the process till you complete 30 bolis. Your soft and tasty bolis are ready to serve.
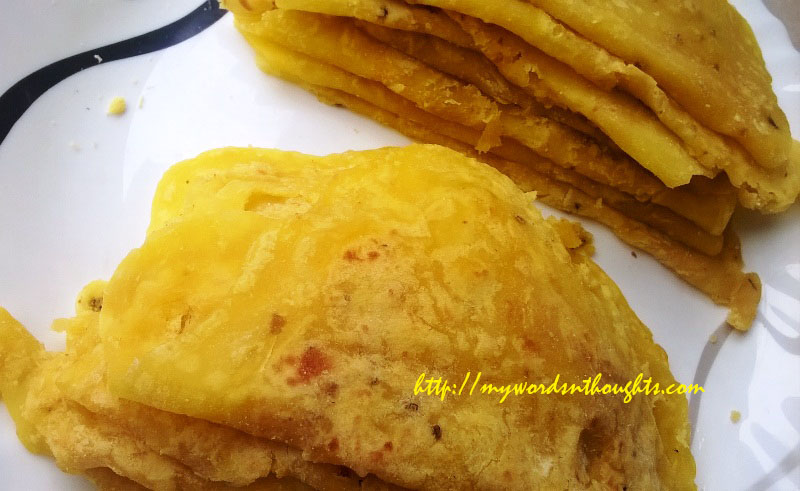
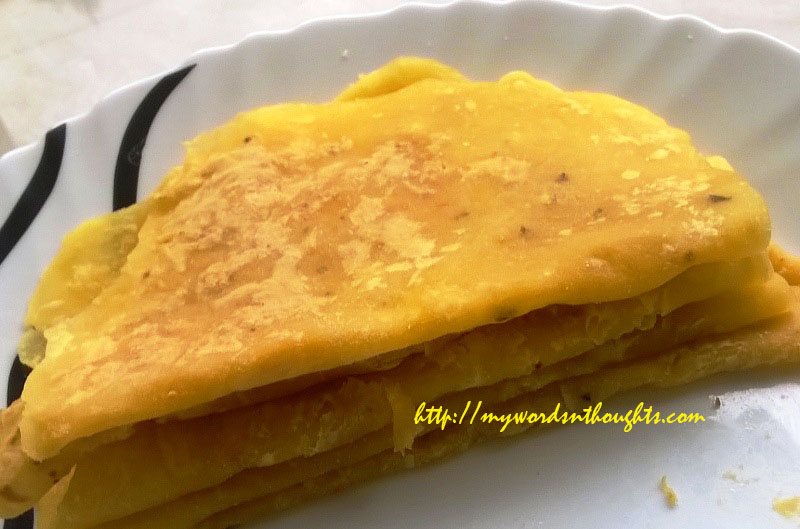
Prepared bolis
There are a few things to note at the final stage of Boli preparation
1. Avoid rice flour as much as possible. How less flour you avoid in the final stage, that much perfect and soft your bolis would be.
2. Soon after you put boli in tawa, you need to wait just for a few seconds only, till blisters appear on its surface. Otherwise it turns hard, change colour too.
3. Bolis appear yellow in colour only due to lemon yellow colour used. You can avoid adding colour, if you don’t want so.
4. Yellow bolis stay fresh outside refrigerator for maximum 3-4 days. If you want to keep it for long, it’s better to keep them in fridge in air-tight containers.
5. They taste best when it’s pretty hot and it’s the best combo for palada or vermicelli payasam, or any type of kheer.
Stuffed Boli – A derivative of normal boli
Boli can be stuffed with Bengal gram-sugar mixture before you fold, to get a tasty variety
You can also make your bolis a bit different and rich, by stuffing the Bengal gram – sugar mixture, but not fully grinded. If so stuff them, while you heat boli in tawa, spraying ghee.
An alternative method to make Bengal gram-Sugar mixture
Sometimes it is a little bit tough to grind Bengal gram-Sugar mixture to a fine paste without any grains. You can also grind cooked Bengal gram to a fine paste, before you fry it in tawa adding sugar, cardamom and nutmeg powder. It’s your choice.
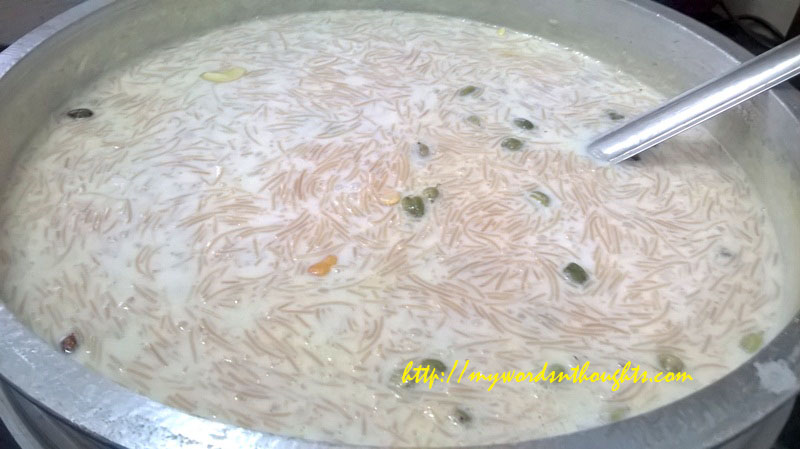
Vermicilli Payasam – The best combo of Boli
You can also read yet another boli recipe here. What I find interesting in this recipe is – Maida balls are prepared first and then dipped in gingelly oil for 15 minutes just before you roll them to prepare bolis. Have a look at this Annie’s recipe too, published in Vanitha Onam Edition 2017.
Also read: Maampazha Semiya Payasam recipe


Recent Comments